

Tools needed: Utility knife, straight edge, and something to mark floor.
Prep & Installation Instructions
(1) How much tile will you need? We recommend that you purchase about 10% more tile than your project will require. This will allow you to cover mistakes, trimming and for future possible damage.
(2) Clean Floor: Clean sub floor free of grease, wax, dirt, oil, foreign matter and any chemicals that may be present. Make sure subfloor is smooth and fill in areas if needed.
(3) Preparation of Sub Floor: Concrete must be fully cured (about 28 days or longer after pouring), free of moisture and alkalinity. Make standard moisture and alkalinity test if necessary. Moisture and alkali will not hurt or damage the RaceDay tile, but it can damage the adhesive and cause it to break down over time. Note: It is the responsibility of the installer or flooring contractor to determine the dryness of all concrete subfloors before installation of floor tiles begins. On grade concrete subfloors must contain an effective, permanent moisture barrier (floor primer or basement proofer). Plywood/solid wood subfloors should be dry and fully cured. It is also recommended to use a primer on wood subfloors for better bond. The primer prevents the adhesive from being absorbed into the concrete or wood surface. Failure to use primer over concrete voids warranty. All holes, cracks, and depressions must be filled with a latex underlayment and any cracks and depressions must be eliminated. Dust should be removed with a vacuum or damp mop and dried immediately before applying peal and stick tile.
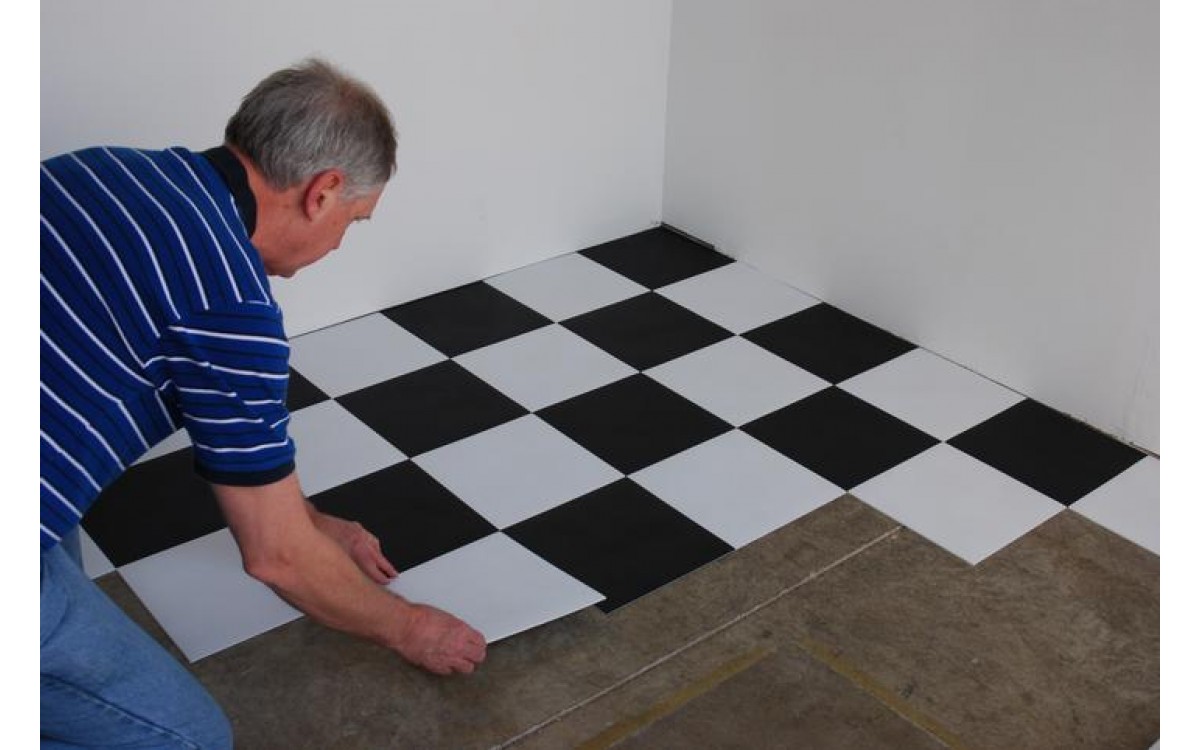
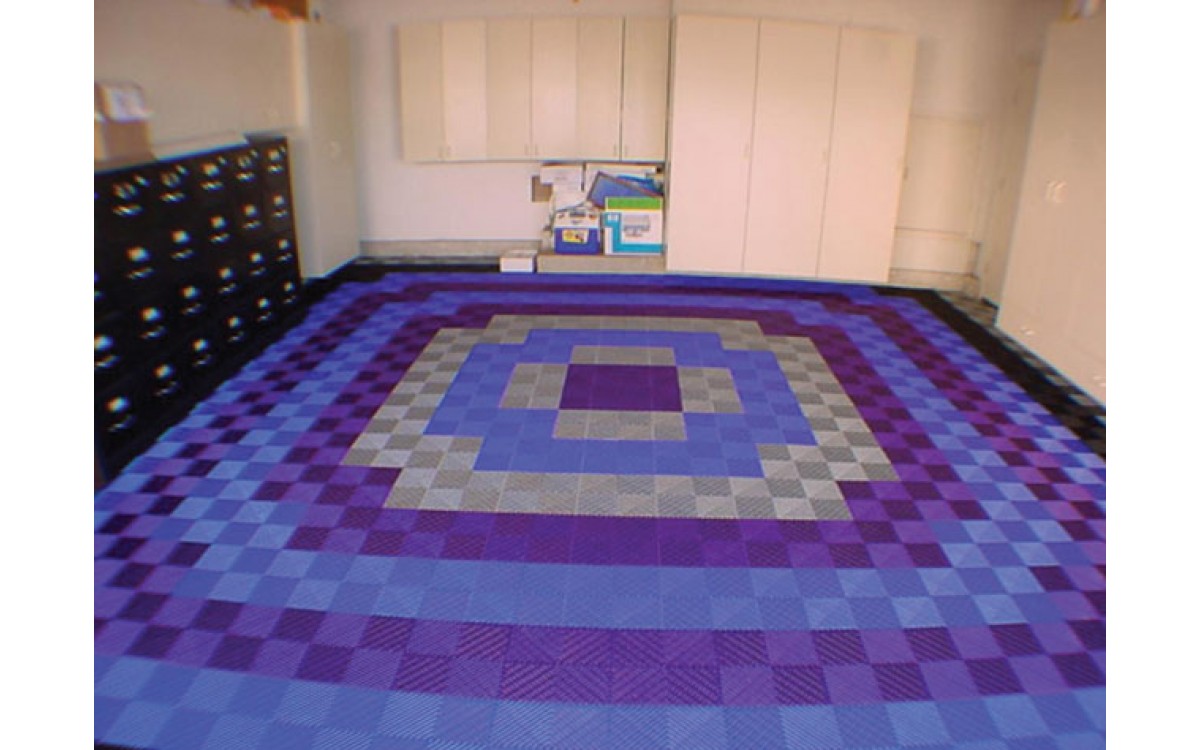
(4) Layout of Room: Lay out some unpeeled tile on floor to see how your pattern and placement will look before actually applying tile. It is recommended to always start from a square point and work out. Treat room as a rectangle and find the center points of two end walls. Mark floor to insure square point and make a guideline with pencil, ink, laser or light chalk line for your first row of tile then entire grid if desired (if using a chalk line make sure you do not have excessive chalk on floor, it can prevent adhesive from sticking).
(5) Laying Tile: Make sure all tile has been stored at room temperature of at least 65 degrees Fahrenheit for a period of 48 hours. Do not install tile in conditions less than 55 degrees Fahrenheit. Always start from center and work out. Peel off release paper and place tile edge flush with marking line and slowly lower remainder of tile onto floor in a bent fashion as if you were unrolling a mat. This will keep air out and assure an even stick. Tile can be peeled back up and repositioned if required.
(6) Boarder Tile: Do not peel off paper from back before you make your cuts. Turn tile over and place loose tile over last row so that one end of loose tile is touching the wall. Then mark paper of loose tile with pencil and cut with knife. Then peel off back of fitted tile, turn over and put in place. When fitting around obstacles make pattern on paper and draw an outline on the back of tile paper to cut shape.
(7) For best results, be sure to roll your floor in both directions after installation to make sure all air bubbles are out and adhesive touches the subfloor.

Garage Floor Tiles Installation
NOTE: Better Life Technology, LLC, COEL Enterprises, LLC and StoreItWell.com is not responsible for installation.